How to Transition Your Band to Management Software in 4 Easy Steps
![]() Simon Hirst // 30 November 2024
//
3 minute read
Simon Hirst // 30 November 2024
//
3 minute read
Transitioning to a band management software can see overwhelming, but here's a blueprint to help guide your band through the process to smoothly transition your band from traditional methods to using a purpose built band management software in four easy to follow steps.
Step 1: Assessing your needs
Remember, not everyone’s needs are the same and depending on the type of band you’re running will vary your needs more. However, be realistic with your needs. Not every software is going to be able to do everything you need, unless you pay a developer to build a purpose built software, but that comes with it's own challenges!
Define your needs: Try and determine what aspects of your band's management you need to focus on, such as gig booking, finances, communication, task management, or all of it!
Research band management software: Look for software that offers the features you need. You can use our guide on Top Band Management Apps of 2024 which will help you see what are the popular band manager tools and what features they do or don’t offer.
Use free trials: Once you’ve found a few software providers which tick all the boxes, take full advantage of free trial and use them to manage a few gigs.
Step 2: Plan to migrate
This may seem a little over the top, but the more you plan the easier your life will be when switching to a band management software.
Assign roles: If you have a team of people managing the band designate someone to manage the transition, whether it’s the band manager or a band member who’s tech-savvy.
Create a timeline: Set clear milestones for adopting the software. For example, you may decide that all gigs after a certain date will be managed on your new band management software.
Prepare for a learning curve: Just be ready, there will be a learning period. Ensure everyone who will be using the software understands how it works and what new processes you will need to follow. This means when the time comes to swap you’re not stressed or panicking about it!
Step 3: Input your information and set up your account
Add your information: Upload data such as band members, gigs, and configure your settings, including adding contract templates, invoice information and logos.
Create task lists: If the band management tool has a task management features use it to assign tasks to gigs so you know what needs to be done and when.
Step 4: Monitor progress and adapt when needed
Evaluate regularly: After a month, evaluate how well the software is working for you, your band and your clients. Are there any features that aren’t being used which could help? Are certain members struggling to use the software effectively?
Get feedback(!): Ask the band members how they feel about the new system and what can be improved. If it’s something you can improve on, act on it. If it’s something to do with the software, reach out to support to learn more.
Be prepared to adapt: As you settle into using a band manager you may need to evolve, be flexible and adapt the software to new requirements.


Calculating the ROI of Investing in Band Management Software
Investing in a band management software not only takes time, but costs money and with this you want to make sure you’re seeing a positive Return On Investment (ROI).
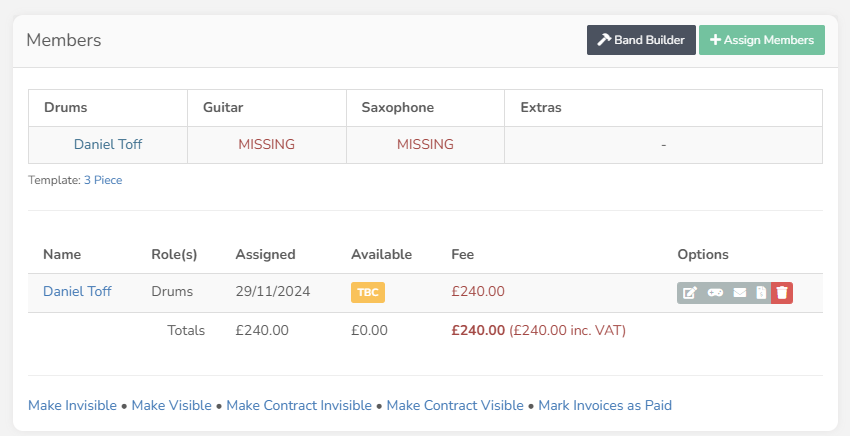
Why You Need a Band Line-Up Builder as a Band Leader
A band line-up builder can help band leaders with this part of the process as it allows you to easily to see which musician is on what gig and which instrument needs booking.
Best Band Management Apps for Bands & Musicians (2025 Edition)
Compare the top band management apps (2025 update). Explore features, pricing, and usability to find the perfect app for your band management needs.